Showing posts with label Eerie Nights Blog Hop. Show all posts

Wednesday, October 26, 2016

Eerie Nights Blog Hop

Hello, and welcome to the Eerie Nights Blog Hop. I hope you have been following along each day. We've seen some wonderful projects. Thanks to Marian at Seams To Be Sew for organizing this, and Amy at Sew Incredible Crazy for being our hostess. I'll share the full schedule at the bottom of this post. You can visit any time to see what everyone is up to!

If you have visited me before you may remember that my life turned upside down a few months ago with the death of my husband. I have been working on cleaning out our house in preparation to moving ever since. When I have something that I can sell and don't need, I've been parting with it. So I've left myself without a dining table. Oh well, I've got a fun table topper to share, and you'll just have to imagine it's nicely displayed!

You can download a pdf version of this pattern for future reference.


When I set the topper down on a kitchen island, this is what I got! My cat, Seamus, thinks everything is for him. And when I tried to move him, he turned his back! Good thing he's cute!


This is made with one block, and which is twisted to get the pattern. I started with paper pieced half square triangle units and proceeded from there.


Next, sew together pairs of half square triangle units.


 Now sew two pairs together, and pinwheel the center seam to reduce bulk.


Close up of the pinwheeled center of the block.


Next, make pairs of blocks, then sew together into blocks of 4 units.


You also need to make four corner units with 2 blocks and 2 plain squares.


To the above, add two plain rectangles. These extend beyond the blocks for now.


Following this diagram, assemble your blocks. The corner blocks get trimmed after you quilt, and before you apply your binding.

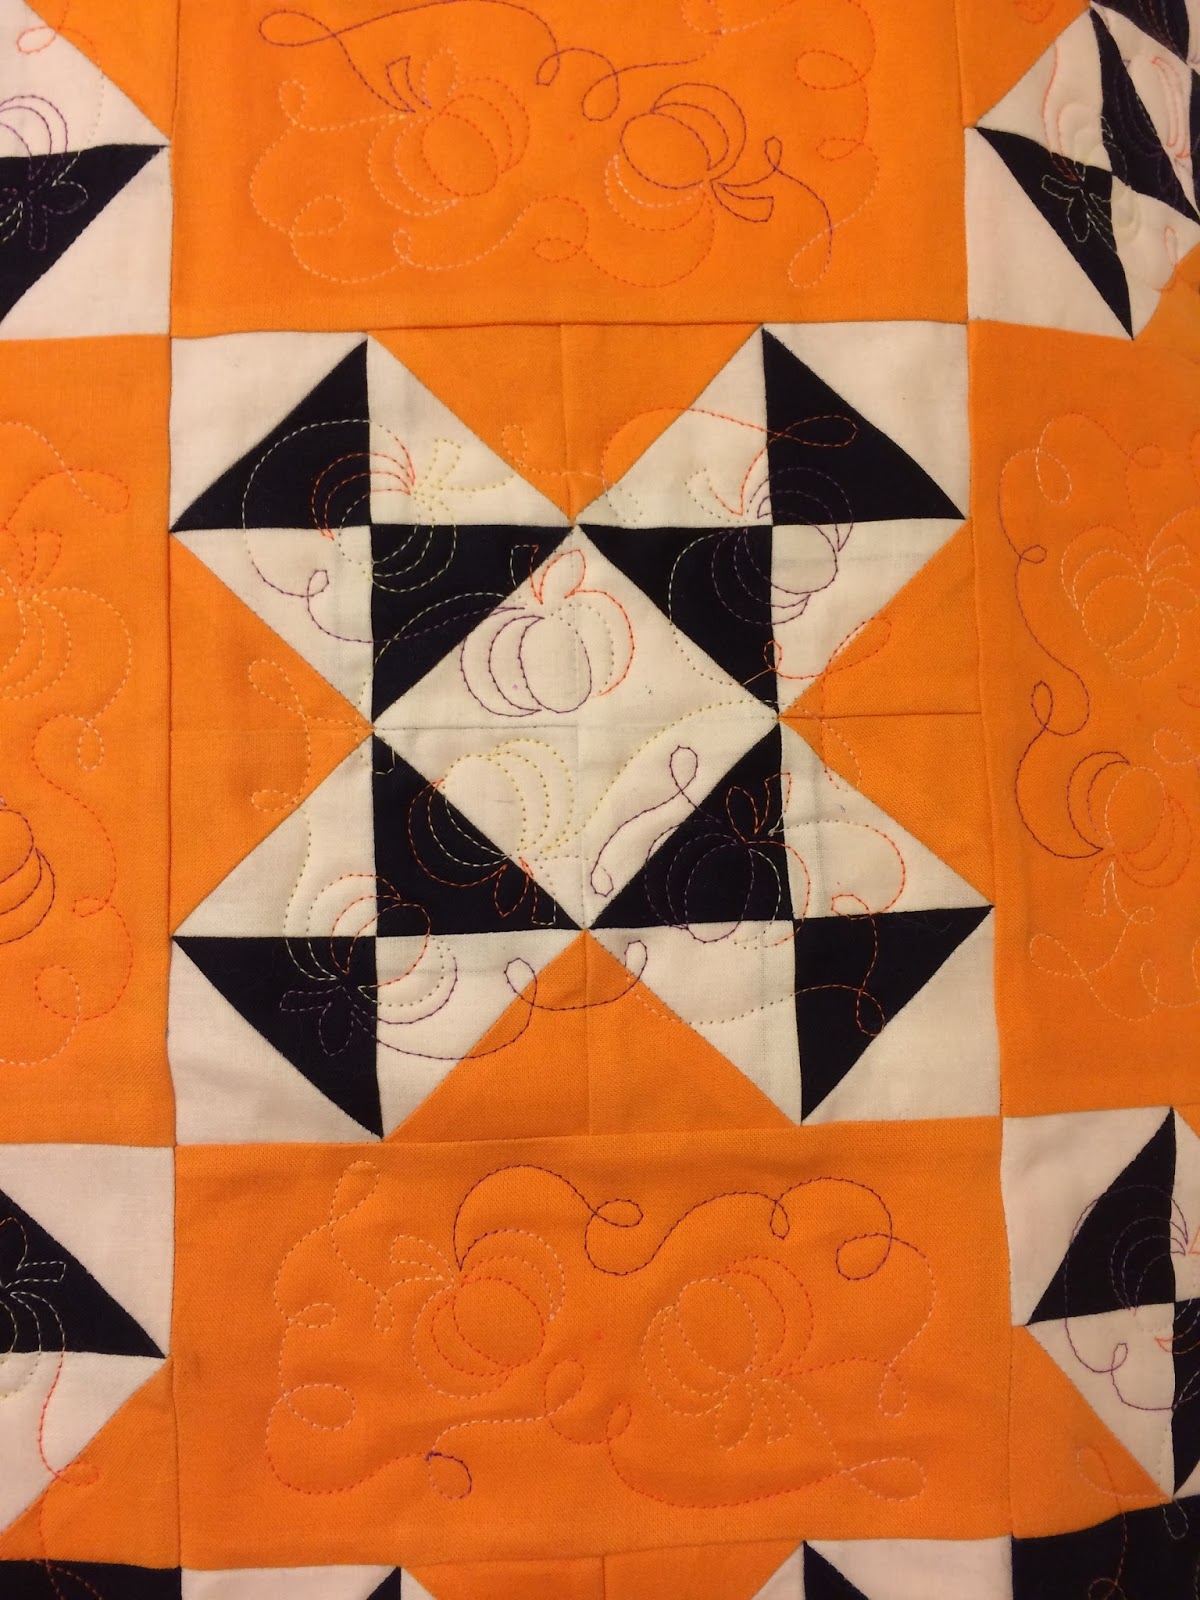

Closeups showing the quilting.


I used designs from a Continuous Line Halloween machine embroidery design pack from Embroidery Online with a variegated thread from Aurifil. I didn't realize the thread included white so it didn't work perfectly, but I like it.


After the quilting you will need to trim off the ears on the corners. Be careful to leave a quarter inch beyond the seam allowance with the neighboring block and at the intersection of the two rectangles.


When trimming around the rest of the topper, I used the center white line (that is at 3-1/4" on my 6-1/2" ruler) and checked that I had 1/4" beyond the points before cutting. 

I cut my binding 2" and sewed it at 1/4". This worked out a bit tight and made the corners (all 12 of them!!!) a bit hard to turn. I'm probably going to take it off and replace it with a 2-1/4" cut binding.

Finished size of the table topper is 24" diameter.

Eerie Nights Blog Hop Schedule:

20-Oct

21-Oct

24-Oct

25-Oct

26-Oct

27-Oct
                    YOU ARE HERE ===>>> Seacoast Quilter


28-Oct


If you have time it's fun to see everyone's projects. And of course, enter the prize drawings. I have a chance for you to win some of my favorite thread, Aurifil. Just leave a comment below and use the Rafflecopter to enter the drawing.

a Rafflecopter giveaway

Thanks so much for stopping by. I am doing a block of the week (or so) using the classic 101 Patchwork Patterns book by Ruby Short McKim rewritten into rotary cutting instructions. We are making a medallion style quilt and have completed one round. Take a look here, or click the tab at the top of the page.

Enjoy,
Mary


Thursday, October 20, 2016

New England Quilt Museum & Eerie Nights

I went to the New England Quilt Museum in Lowell, Mass today. They have a monthly book group lunch meeting that includes a nonfiction title and a fiction title. The fiction today was Whiter Than Snow by Sandra Dallas. I've read several of her books but not this one. It sounded like an amazing story so it's gone on my list. The other book discussed today was 101 Patchwork Patterns by Ruby Short McKim. I was invited to speak a bit and show the quilt to date. It was very interesting to see the couple antique Ruby McKim quilts and some blocks that they have in their collection. I hadn't been to the museum in a while and I really should go more often. The exhibits are always incredible. The current exhibit that just opened today is America's Appliqued Quilts from the Christ Collection. If you are anywhere in the area be sure to see it.


Now, for the promised first part of 101 Patchwork Patterns quilt assembly. I have a step by step document to help, and it is pretty straight forward. If you have any questions, on any block or other instructions, please ask. I am always glad to help. I know what I write makes sense to me, but may not always make sense to you. I ran to one of my local quilt shops yesterday to pin the quilt up for a photo, and it looks like it needed pressing. I changed the arrangement from the drawing a bit to distribute the colors nicely.


The Eerie Nights Blog Hop started today. You can see the full schedule at Sew Incredibly Crazy. There are lots of great prizes and fun projects to see. My day is next Thursday, October 27. I've got a free pattern for you.

Thanks for stopping by. If you get your quilt center together please share a photo on Facebook. We'd all love to see it!

Mary


Friday, July 29, 2016

101 Patchwork Patterns Block 8 Pinwheels

Thanks to all who visited and commented during the Summer Sensations Blog Hop. I'm glad everyone liked the placemat tutorial. If you missed it, you can see it here. I had so much fun with the hop that I've signed up to join Marian of Seams to Be Sew again in October for the Eerie Nights Blog Hop, starting October 20th.

Halloween is my favorite holiday to decorate for. I'll have a new project to share on my day. It's easy, and will work in lots of colorways, not just Halloween!

101 Patchwork Patterns - Block 8 Pinwheels


Download the Pinwheels block.

Here is another block that is made up of units we've done before. Block 4, the Churn Dash, includes a photo tutorial of making half square triangle blocks. After you make the pinwheels the block is together in no time!


Here is a drawing of the quilt including today's block. Don't forget, you can position your 9 inch blocks any way you would like within this round.

I apologize for not sewing the block today but I've been a bit under the weather. Hopefully I'll bounce back soon and be running my sewing machine at full speed.

Thanks for stopping by,
Mary